Not sure you’ll like camping? Don’t worry — it’s perfectly fine to pitch your tent close to home or right by your car as you test the waters.
What To Pack in Your Car
- Tent with a rainfly
- A tarp or two (you never know when you’ll need one)
- Down sleeping bag with cold-weather-temperature rating for 10 degrees Fahrenheit or colder (Colorado nights are chilly year-round, especially at higher elevations, so you’ll want to be cozy)
- Camp pillow and sleeping-bag pad
- Camp stove, plus a lighter or matches (and extra gas canisters for your stove in case you run out)
- Plenty of drinking water (at least one gallon of water per person per day)
- Food; if you’re car camping, store your perishable items in a cooler with lots of ice
- Water-purification tablets (especially if you’re backpacking, which refers to an overnight or multi-day journey where you carry gear and supplies on your back.)
- Can opener, aluminum foil, compostable paper plates, cups/mugs, pots and pans, multipurpose knife, trash bags and paper towels (store it all in one container for easy access)
- Layers of clothing, including a water-resistant coat, wool socks, a warm knit cap, gloves and long underwear
- Flashlights, headlamps and lanterns (make sure they’re charged or have new batteries before you go camping)
- Sunscreen, insect repellent and a first-aid kit
- Toilet paper for when nature calls, plus a trowel (this is especially important if your campsite doesn’t have its own bathroom and you need to pack “it” out)
- Baby wipes and hand sanitizer (to keep that body clean!)
- Doggie poo bags if the pup is coming along, plus travel food and even a dog bed
Pro tips: Bring plenty of lights (headlamps, lanterns and flashlights are all good options) and know where you’ve stored them, especially if you’re setting up camp in the dark. And if you’re not ready to invest in all the camping gear you need, you may be able to rent at least some of it from a Colorado outfitter.
Remember: Colorado’s wildlife is plentiful (and open to eating your tortillas or peanut butter) so know the etiquette of wildlife encounters — like never leaving food and trash unattended, even if you’re right next to it, and storing it securely (like in a locked car with the windows rolled up or in a bear-proof container as conditions require). A bear-proof box, otherwise known as a bear canister, is literally a sealable, physical barrier used to protect your food from wild animals. Some campsites may provide bear-proof lockers but check ahead to confirm. If you’re staying on national park land or at a managed campground, always find out about food-storage requirements — as not following the rules can result in fines and other penalties.
Where To Set up Camp
Whether you’re setting up in an established campground with all the bells and whistles (like public bathrooms and picnic tables) or opting for dispersed camping (meaning no amenities) on public land, the first thing you’ll do — upon arrival — is pick a campsite. If you’ve reserved your space, make sure you’ve completed site registration, which may include paying a fee and filling out any required paperwork or putting a parking pass on your vehicle’s dashboard.
Pro tips: Colorado campsites book up early. In addition, all state parks currently require reservations for campgrounds (almost 300 of which are considered accessible). We suggest keeping an eye on your favorite spots and booking months in advance.
Now it’s time to set up your site by picking a gloriously scenic tent spot that is ideally flat, free of plant life and pointy rocks, shaded from the sun, protected from wind and free of standing water. If you look around, you’ll likely see a clear area where others have pitched their tents.
Construct your tent first, then methodically organize the rest of your site — like the outdoor kitchen area (where you’ll place your camp stove while you’re cooking) and living area (chairs around your established campfire ring). If you’re doing dispersed camping, seek out a spot that already has an established fire ring rather than make a new one to preserve the area’s natural landscape and prevent wildfires.
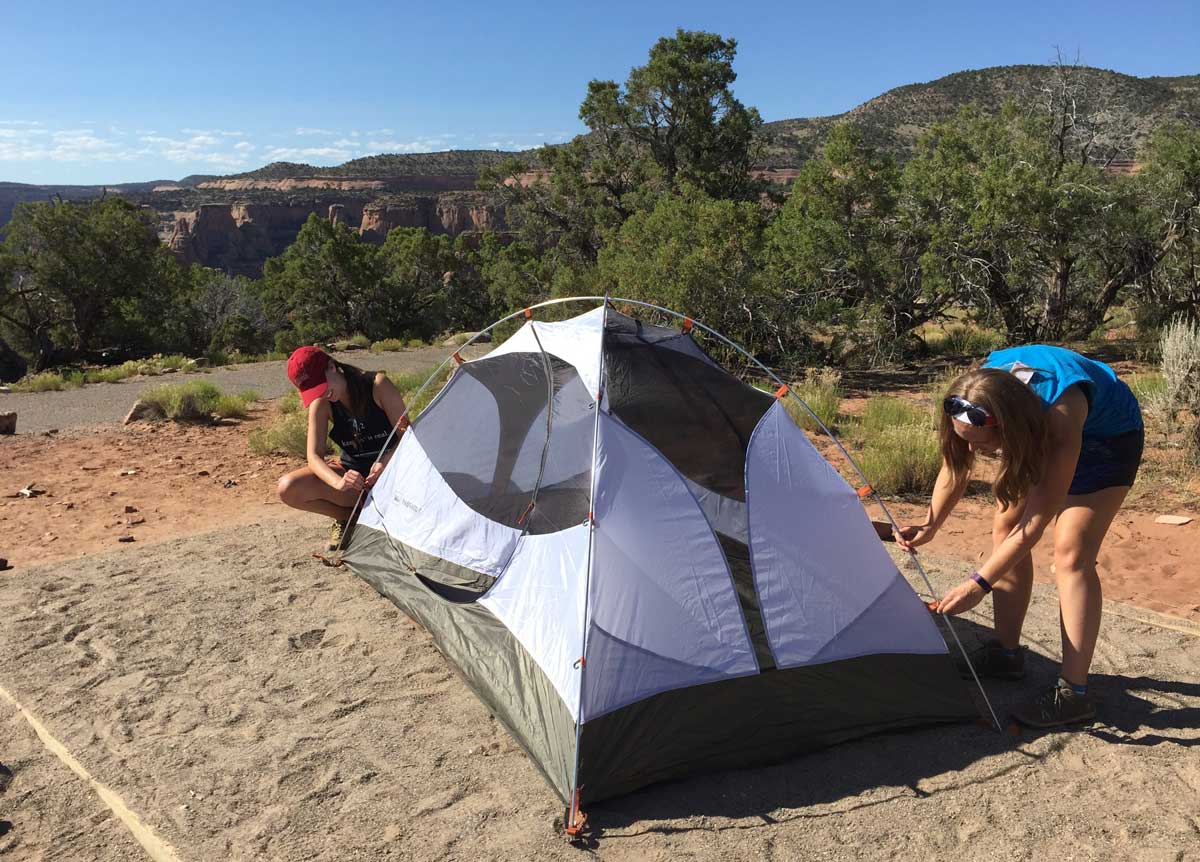
How To Pitch a Tent
Step 1: Get Prepped
Putting up your tent can be a one-person job, but it’s way faster with teamwork. To get things going, assign everyone in your camp family a job and inventory your tools and equipment. You’ll need a tent footprint (a piece of nylon that is placed under the tent), the tent itself, the tent fly (the other layer of the tent, also referred to as the rain fly), poles, stakes — and it never hurts to have a tarp or two, especially if there’s rain in the forecast. A small mallet or hammer to pound tent stakes into the ground is always helpful, but you can use a hand-sized rock in a pinch. Extra stakes, the metal spikes used to secure tents to the ground, are useful since they’re small and tend to go missing.
Pro tips: Before leaving home, inspect your gear and practice setting up the tent in your yard or even a neighborhood park. While you’re packing your car, take note of where you put your tools and flashlights. And, when you’re setting everything up, keep essentials nearby, like flashlights and headlamps if it’s dark, insect repellant — or maybe even a deliciously chilled Colorado craft beer.
Step 2: Read the Directions
Depending on your tent’s size and brand, the setup process might vary a bit, but the basics are the same. Even so, to avoid potential harm to your tent — and lots of wasted time — read the directions beforehand.
Step 3: Determine Tent Orientation
With your campsite picked out, the next step is to decide the tent’s position, meaning which way the doors will face for easy entry and exit. Now, place the footprint, or the nylon base of the tent, to match your selected placement and stake it to the ground at the corners. FYI: The footprint is important because it acts as a moisture barrier. Rain in the forecast? Face your tent’s doors away from the wind to prevent water from gusting inside.
Step 4: Build the Tent
Place your tent flat on the footprint, paying attention to door placement, direction and where to insert the poles. Stake down all four corners of the tent with your mallet, hammer or rock. (Don’t skip this step or the wind could send your tent flying off!) Next, unfold the interlocking poles and slide them into their respective fabric sleeves and clips. In most but not all cases, poles will form an X over the top of the tent (all the more reason to read the directions to be sure). To stand the tent upright, you’ll slowly bend the poles down to the tent’s four corners and secure them. The way you do this can vary tent by tent, but in general it’s done by inserting the pole end into a circular eyelet at each corner.
Step 5: Attach the Rainfly
Once your tent is up, it’s time for the protective rainfly (also called a tent fly, it’s the taut, nylon covering that acts as an extra layer of protection from the elements). It attaches over the tent and you’ll also stake it to the ground. You can also tie guylines (tensioned string used to stabilize your tent) to nearby trees and/or stakes, especially if blustery winds are forecasted.
Pro tips: Try facing your tent’s zippered entrance toward a stupendous Colorado view to enjoy while lying in your sleeping bag each morning. Keep your tent zipped up to ensure bugs don’t fly in. And it’s always a good idea to take your shoes off before going inside to keep it free of dirt and debris.
Learn more tent setup tips here with REI
How To Start a Campfire
Now that your camp is set up, it’s time to focus on warmth (and roasting your gooey s’mores). However, be very careful as even a tiny campfire can easily get out of control if not tended to and extinguished properly. The guidelines from National Park Service can teach you how to responsibly start and manage your campfire. Learn how to minimize campfire impacts with these Do Colorado Right tips.
Looking for a Camping Experience With Little to No Setup?
Glamping and RV camping both offer the unique experience of sleeping near nature without a lot of the work. Glamping is a luxe form of camping where guests reserve permanently constructed tents with home-like offerings that include Wi-Fi, kitchens, private bathrooms and real beds. Renting an RV or campervan will similarly give you comfortable “indoors-like” sleeping accommodations and private bathroom access, yet you can drive straight into nature and park — or opt for dedicated RV site in a managed campground.
Want More?
Learn ways to Do Colorado Right
Check out 11 amazing campsites
Learn more about the basics of camping in Colorado